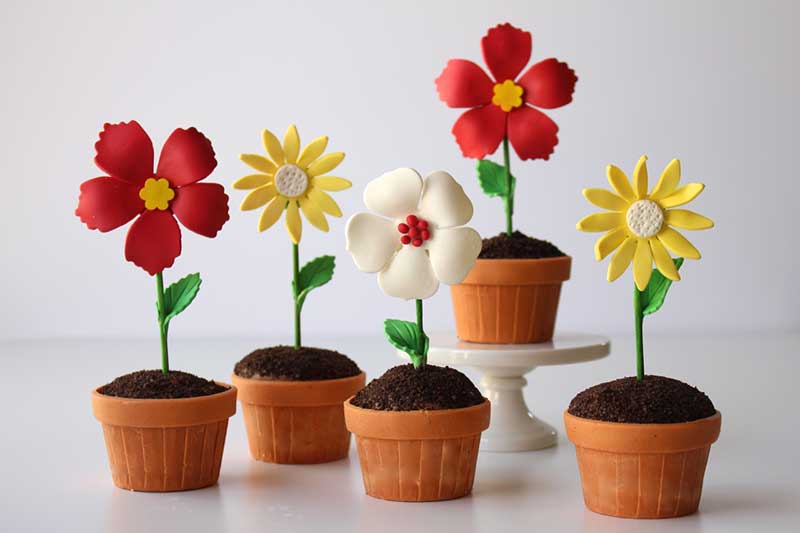
Spring has sprung and the flowers are blooming in these adorable mini flower pot cakes! I love creating desserts that look like real objects, and this little pot full of dirt is no exception. They might not look like it, but these little treats are fully edible. The pots are made of colored chocolate, filled with your favorite cake, and topped with decadent buttercream icing and cookie crumbs.
Get creative with the type of flower you choose to “grow” in your pot—the options are endless! This project is surprisingly easy to create and fun for all ages.
Edible supplies:
- • Chocolate or candy melts
- • Terra cotta/orange
- • Green
- • Colored modeling chocolate or fondant
- • Terra cotta/orange for pot
- • Green for leaves
- • Selection of colors for flower blossoms
- • Green candy sticks or matcha flavored Pocky (check your local grocery store)
- • Baked cake
- • Chocolate buttercream
- • Crushed chocolate cookie sandwiches
- • Water or piping gel
Non-edible supplies:
- • Paper snack cups
- • 2” round cookie cutter
- • Flower and leaf cookie cutters
- • Paint brush
- • Knife
- • Ruler
To prepare the flower pots:

- Melt chocolate and fill paper snack cups.
- Chill for five minutes then pour out excess chocolate. Repeat if necessary to build up cup sides.
- Once fully hardened, gently peel away the paper cup and set aside.
- Cut your cake using the round cookie cutter and place it inside your chocolate cup, securing it with a small amount of buttercream on the bottom.
- Top your cake with chocolate buttercream and dip the top into a bow filled with crushed chocolate sandwich cookies. Chill until buttercream is firm.
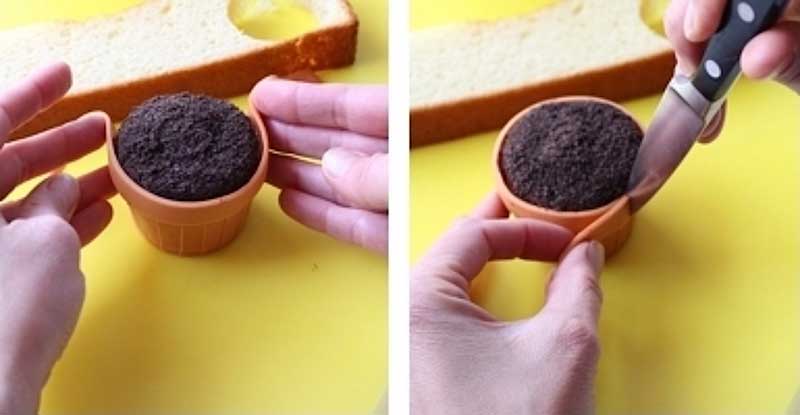
- Roll out a 9” strip of modeling chocolate/fondant then trim into ½” strips.
- Using water or piping gel adhere the strip to the pot, positioned halfway on the chocolate and halfway on the buttercream to create the rim of the flower pot.


To prepare the flowers:

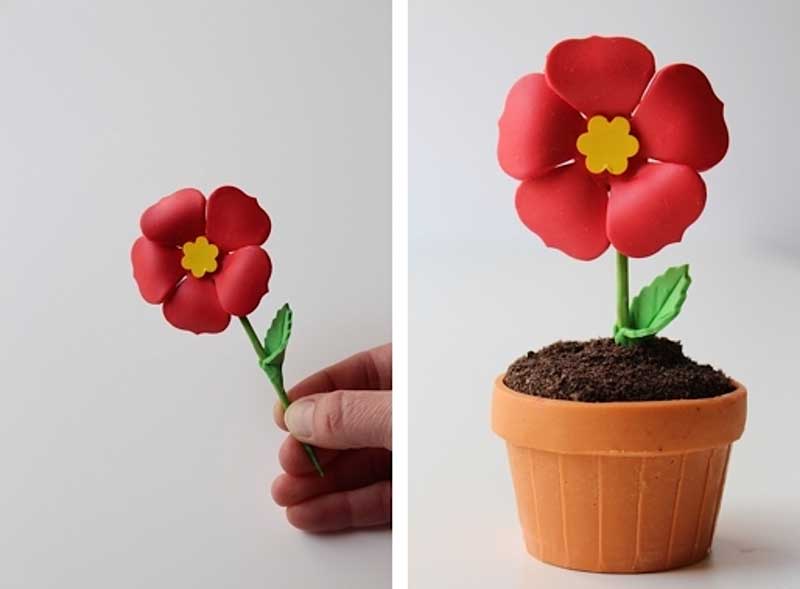
- Roll out modeling chocolate or gum paste to 1/8” thick. Cut blossoms and leaves using a cookie cutter, manipulate the petals to give shape, and set aside to dry overnight.
- Once the blossoms are dry, decorate the centers and adhere your blossom and leaf to a green candy stick with melted chocolate.
- Insert completed flower into pot.
Voila! Before you know it, you’ll have the sweetest garden of mini flower pot cakes to enjoy. Fortunately, you don’t need to have a green thumb to make these charming treats, so gather your “gardening” supplies and bake up these mini cakes for your next garden party, birthday, or simply to brighten up your day!
Let us know what you think and tell us your own ideas in the comments! Then, head over to our Facebook group to share your photos of this project.
Can’t wait to try these!
Beautiful! My Girl Scouts will love this project, I run a very diverse, Girl Scout Troop in Norcal...and they will make these like crazy for the entire "hood".
I LOVE this :-)